Sunday, January 26, 2020

Investigation 9

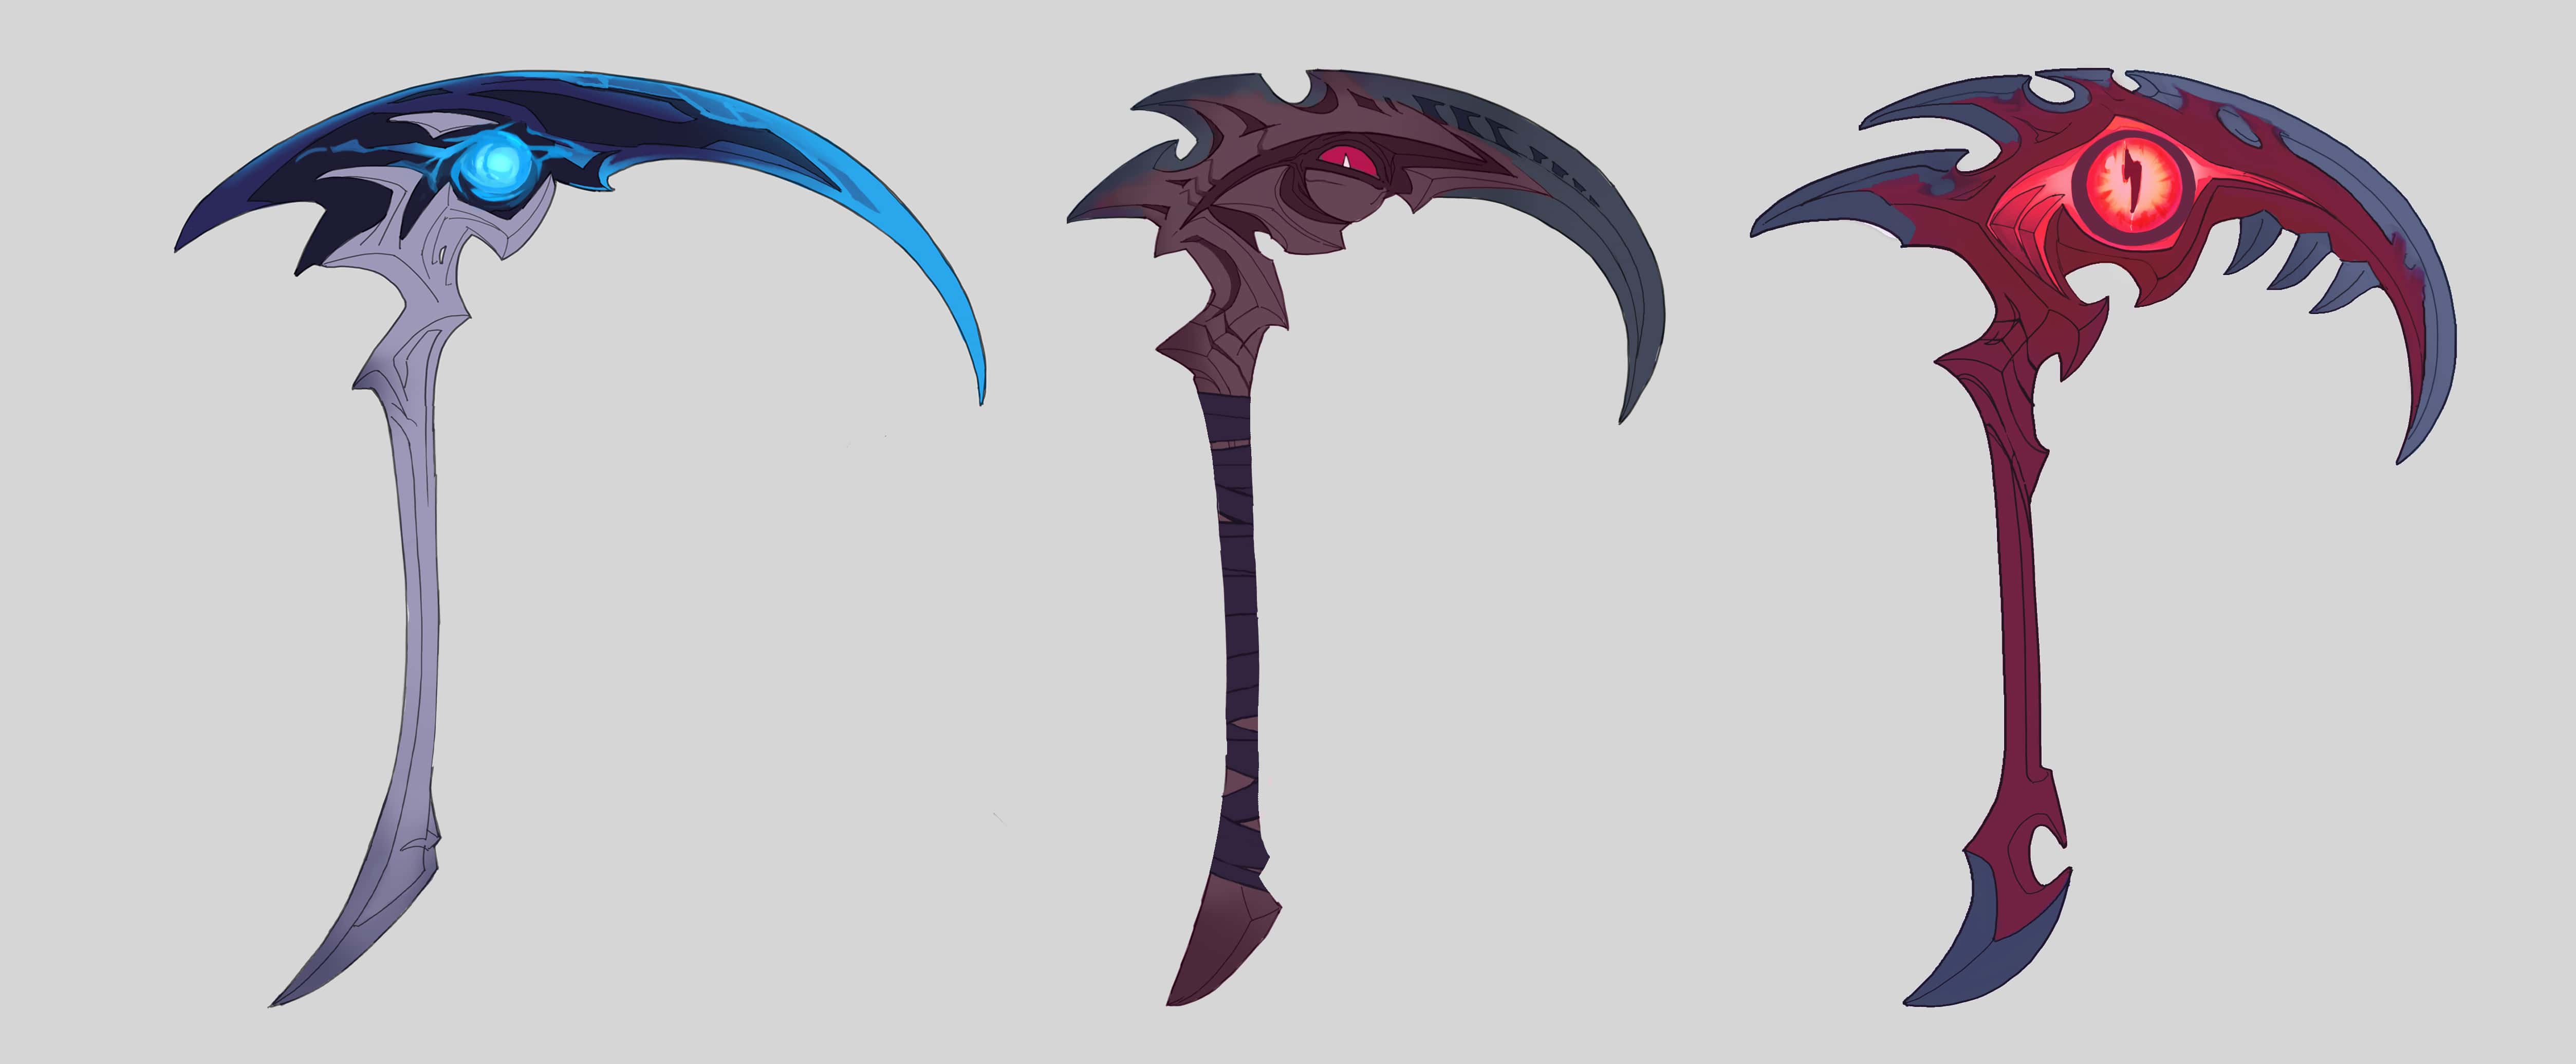
So over the course of the week I did some more weapon creation. I made two weapons, a scythe and a chakram. I found two references and tried to make it in a similar way by making in a way I have not tried to before with someone helping me along the way. I am very satisfied especially with the scythe on how it turned out and plan to further use this and polish this way of creating weapons.


Image result for kayn scythe           


Sunday, January 19, 2020

Investigation 8

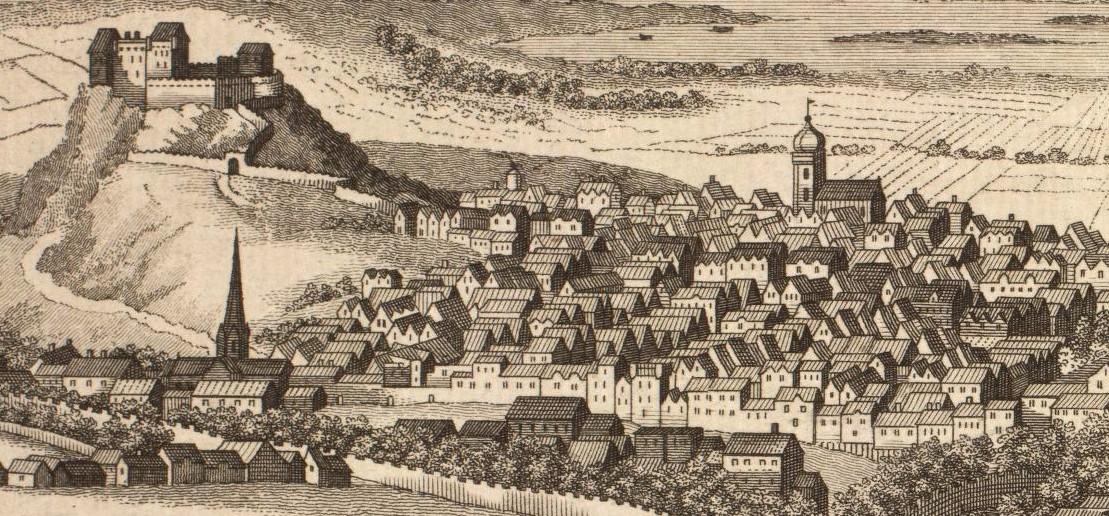
Over the course of the week we have still been doing end of the marking period 2 presentations so I have been doing some investigating at home. What I really wanted to accomplish this week was get the idea of the town down pat so I could start working on it. The goal is to create a village that looks like it takes place during the medieval time period. The toughest part of the village making for me is the style of building I want to go for. For me I want to go for a more brick/wood look. Then my next point is creating a layout of the town and for that I found some references for what I could do down below that I liked. I plan to do a simplistic layout of the town and then as I complete the parts for it, detail it out and slowly shape it into the town I hope to create.

Sunday, January 5, 2020

End of MP 2 Blog Post

                                                     Intention Definition & Exploration Ideas
Throughout the seconded marking period I tended to expand a bit from my main goal. My main idea was to work on a story with the theme chosen by destiny. For this story I wanted to create a antagonist that was a representation of chaos and trickery. Besides working on the story in bits I worked on some other little projects. I also worked on some set making for cvtv and tried to experiment on how to represent the holiday that I worked on. The other final thing I worked on was 3D printing. I wanted to continue what I worked on my first year which was creating a deck box using the 3D printer.

Planning
Over the second marking period I made a rough storyboard of the story is subject to change but just a rough draft of what I think of at the moment. There are still characters that need to be made and the setting still also needs to be created but overall it's coming together slowly but nicely. For the way I planned to make sets was I wrote down the main idea of what it was with points under it of what should be included in it. Finally for the 3D box all that is left is just some tweaking to measurements since parts of it would not connect properly to each other.

Producing
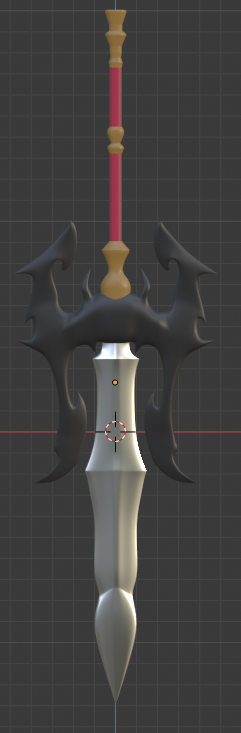
During the marking period I worked on parts of the story which can be seen below. I was able to work on the main antagonist(The red character), a monster and the protagonist's weapon. While I don't have the picture I also created the first version of the 3D printed box. It turned out a lot smaller than expected so I learned I had to print the top and actual box itself seperately. I also worked on a version of the set for valentine. Even though after some work on it I realized I did not need to make it so I just worked on it for practice.


Evaluating
How I felt over this marking period is better than the last one. I was able to accomplish a lot more than the first I feel happy about that. But like last marking period I feel like I could still improve on time management with working on these things. For me it's just a bad habit I really wish to improve on by designating time for the story and the other parts. Overall I felt like I improved compared to last marking period with modeling but I still want to improve more.

Integrating
Since I have moved on to blender 2.8 there are a lot of new features for me to take advantage of such as it's new rendering engine which makes rendering a lot better and more managable compared to its previous versions. However there are still many features I still haven't messed with that I feel if I took advantage of I could really improve my modeling with it.
Wednesday, January 1, 2020

Make up Investigation(3)

Another thing I did over Christmas break was do some investigation for the main character design. I wanted to the make the main character stand out so I wanted to see what I could find/come up with. What I came across was a cloak style that I really enjoyed and hope to see if I can replicated. I really like the look of the first one and want to see if I can make something similar to that. I can understand how its made where its just parts extruded of the main character. It something similar to the previous years of digital modeling where we made a character model so I can use it as a reference in making the character. The only difference I would do is see if I could smooth it out instead of it having that low poly look to it. Overall when I get back into school I hope to work on something similar and reference back to these images when working on the character.


Image result for blender low poly hero

             
Related image

Make up Investigation(2)

I did some research on 3d printing with locks and I found a website that goes over a man who was able to 3D print a key for a lock and actually get it to work. The way he did this was taking flat pictures of his key and then carefully tracing it in blender. After tracing it he extruded it slightly and then 3d printed it. To his surprise he got it to work the first try he printed it. I really thought this was a neat idea and want to see if I can try and replicate this experiment. If I can I want to see if there are other things I can try use this idea with. Possibly maybe try some kind of gear setup or do something with screws and see if if I can make a tightened object with said screws or something of the sort. 

Make up Investigation(1)

Image result for deckbox
https://pbs.twimg.com/media/DeoowN-UwAAQaWQ.jpg 


At the last week of school before Christmas break I attempted to 3D print my finished modeled deckbox. When it was printed I made the mistake of printing the lid with the box itself. Making the whole thing smaller in the process. So I figured out I have to print each part of the deckbox seperetly. When I plan to do next is somthing similar to the picture to the left. Where the box top connects to the bottom sealing it while also being a great way for a lid to work. I want to go more into using physical locks and such with 3D printing. I want to see the extent of what I can accomplish with only 3D printing.


Sunday, December 15, 2019

Investigation 7

Over the course of the week I wanted to do a little side project where I wanted to do a sort of continuation of what I did about two years ago where I 3-D printed a card box. What I planned to do was imprint a picture I outlined onto a cube that I would measure into the deck box. I wanted to do this to experiment more with 3-D and what I can do with just the idea of working with physical locks and such. Over the week I've had to deal with problems of it not imprinting onto the cube and had to get creative with how to do so. But towards the end I started seeing some progress and hopefully am able to have it work fully. After I that is done I am going to measure it out to the size to hold cards firmly with it's size. Then I plan to experiment with physical locks using 3-D printing. I got the idea from looking at my calculator where it back piece is stuck on only by a physical lock but if pressure is applied it can come off. I really intrigued me since all it uses is an indent on the slide piece and the calculator has a bump so it keeps it in place so I wanted to see if I can replicate that for the top of the box. Hopefully over the course of this next week I can finish the box and starting working on to top and get it to where my idea becomes true.

Sunday, November 24, 2019

Investigation 6

Over the course of this week I did some basic weapon works for the basic enemies. They are just different versions of each one and the basic enemies will just have different color differences of these types of swords. These swords are based of katanas with each one having a different theme to them. Also mid-way through the week I was forced into the use of the new blender 2.8 which while it may be better, will take some time to get used to. I definitely want to use some new features of blender 2.8 such as its new real time rendering system to make some better looking work with details and such. I have also been recommended by Mr. Bomboy to look at a tutorial series created by a youtuber known as CG Boost who goes into detail and explains features about Blender 2.8 to people new to blender and old blender fans coming back. So far I definitely can see the appeal of the new blender 2.8 just for me however it will definitely take some time adjusting to new controls and the many slew of new features that blender 2.8 offers.

.


Sunday, November 17, 2019

Investigation 5

Over the course of the week I started to create some components of the story. One character I started working on creating was the main antagonist. I wanted to design this character as a devil of sorts. I wanted to give him a sort of classy look as of like a rich man. The main idea of this character is that the main character makes a deal with him which ends up turning bad very fast wreaking havoc on the village he tried to make better with his deal. Overall his character design is done but I don't know what im going to do with his face or how it should look so I decided im going to come back to that after doing more work on other parts. After finishing the antagonist's design I started working on the main weapon of story. I used a reference for the main design of the blade because I liked the look of it and I wanted it to look like it. The reference image I used had the blade as a very stony like texture to it so after creating the model for it I wan't to see if I can replicate that style it had to it. After I finish working on the sword I plan to work on the main character and see if I can get a design for him and create him so I can move onto the next course of this creation.


Sunday, November 10, 2019

Investigation 4

Over the course of this school week I started working on planning and creating the medieval town that the story will take place in. I found an interesting way to do this with a website I found that is called Medieval Town Generator. That toughest part that im fearing im gonna have with this is it looking like it's actually in medieval times. I've been looking at other websites and references for the style that was used back then when they would create structures. From what I've seen they even have different styles depending on where they are located from little villages to castle towns. I plan for the setting to be a little town which will have less buildings but let me put more detail into them. One major concern for me is how I detail my work. Over the course of the summer and the beginning of the school year a lot of my work, to me, doesn't seemed to have the detail level of say the tutorial that I looked at below. So if I try to put major detail into buildings but have a tough time with doing so with characters it's going to look off. So I hope to strike some kind of balance between the two.


                     https://www.youtube.com/watch?v=GlyhFyfVGbE

https://www.pinterest.com/pin/264938390563923744

https://assets.sutori.com/user-uploads/image/7d2fd51d-9079-4ef5-a024-d01bde7ba378/6ecad0bd25b55b20067235ac435e8ba4.jpeg

https://www.turbosquid.com/3d-models/poser-set-medieval-buildings-fantasy/976242

https://www.deviantart.com/grimdreamart/art/Medieval-Buildings-646675337

Monday, October 21, 2019

End of MP 1 Blog Post

Intention Definition & Exploration Ideas
Throughout the first marking period I wanted to toy with idea of using themes and possibly start to create some kind of story with it. What I decided to come up with is a story with the theme of chosen by destiny. I wanted to see how well I would do with creating a mini story with a theme given to it. The idea was that he would be chosen by destiny to protect his town from some monster attacking it. Besides this another thing I have taken interest is working on editing the digital set for cvtv and set it up for holidays like Halloween,Christmas,new years etc.

Planning
Through the course of the marking period I have worked on some pieces for it so far. The idea I had for the enemy was some sort of skeleton warrior that the main character would fight. I haven't had a chance to work on the set yet but when I do i'll have to figure out how to use blender 2.8 since it's a more recent file than what I do most of my work on now which is the blender 2.7 version. I am still debating on whether I wan't the characters as low poly or not but it's something I have to experiment with while moving forward with this project.

Producing
I attempted to make skeleton parts from a reference image,mostly the parts that would stick out of the body such as the arms and head. After making it I thought I would test what it would look in a body and since it's close to Halloween I decided to make a orange version with a hat. I also tried to get ideas for the town and I what I decided to go for is a sort of midevil town. I liked the idea of it being a sort of folk tale so I decided for it to feel like taking place in the past.


Medieval Town Map

Evaluating
I feel I have my ideas in place I just have to start working on producing the setting and characters that will be in the story itself. The skeleton work for the enemy is done I just need to create a body for said skeleton. Since I haven't done something like that before it was fun and interesting on creating a skeleton since its a bit different then just creating a person or object. My time management is something I have to work on when doing a project like this which takes up some time to work on.

Integrating
From doing this it has really required me to practice with things I may not be that comfortable with such as creating something from a reference image. It allows me to practice with being creative and trying to implement my thoughts into what I am trying to make, which sounds easy on paper but a lot harder in practice. Overall doing this has let me polish skills I have been using for blender and try out some new ways of using blender that let me make more detailed and better objects.

Late Blogpost 2

Semi-recently I had attempted to enter a contest to be an accessory creator. The task was to create two accessories that took up two differe...