Sunday, January 26, 2020

Investigation 9

So over the course of the week I did some more weapon creation. I made two weapons, a scythe and a chakram. I found two references and tried to make it in a similar way by making in a way I have not tried to before with someone helping me along the way. I am very satisfied especially with the scythe on how it turned out and plan to further use this and polish this way of creating weapons.


Image result for kayn scythe           


Sunday, January 19, 2020

Investigation 8

Over the course of the week we have still been doing end of the marking period 2 presentations so I have been doing some investigating at home. What I really wanted to accomplish this week was get the idea of the town down pat so I could start working on it. The goal is to create a village that looks like it takes place during the medieval time period. The toughest part of the village making for me is the style of building I want to go for. For me I want to go for a more brick/wood look. Then my next point is creating a layout of the town and for that I found some references for what I could do down below that I liked. I plan to do a simplistic layout of the town and then as I complete the parts for it, detail it out and slowly shape it into the town I hope to create.

Sunday, January 5, 2020

End of MP 2 Blog Post

                                                     Intention Definition & Exploration Ideas
Throughout the seconded marking period I tended to expand a bit from my main goal. My main idea was to work on a story with the theme chosen by destiny. For this story I wanted to create a antagonist that was a representation of chaos and trickery. Besides working on the story in bits I worked on some other little projects. I also worked on some set making for cvtv and tried to experiment on how to represent the holiday that I worked on. The other final thing I worked on was 3D printing. I wanted to continue what I worked on my first year which was creating a deck box using the 3D printer.

Planning
Over the second marking period I made a rough storyboard of the story is subject to change but just a rough draft of what I think of at the moment. There are still characters that need to be made and the setting still also needs to be created but overall it's coming together slowly but nicely. For the way I planned to make sets was I wrote down the main idea of what it was with points under it of what should be included in it. Finally for the 3D box all that is left is just some tweaking to measurements since parts of it would not connect properly to each other.

Producing
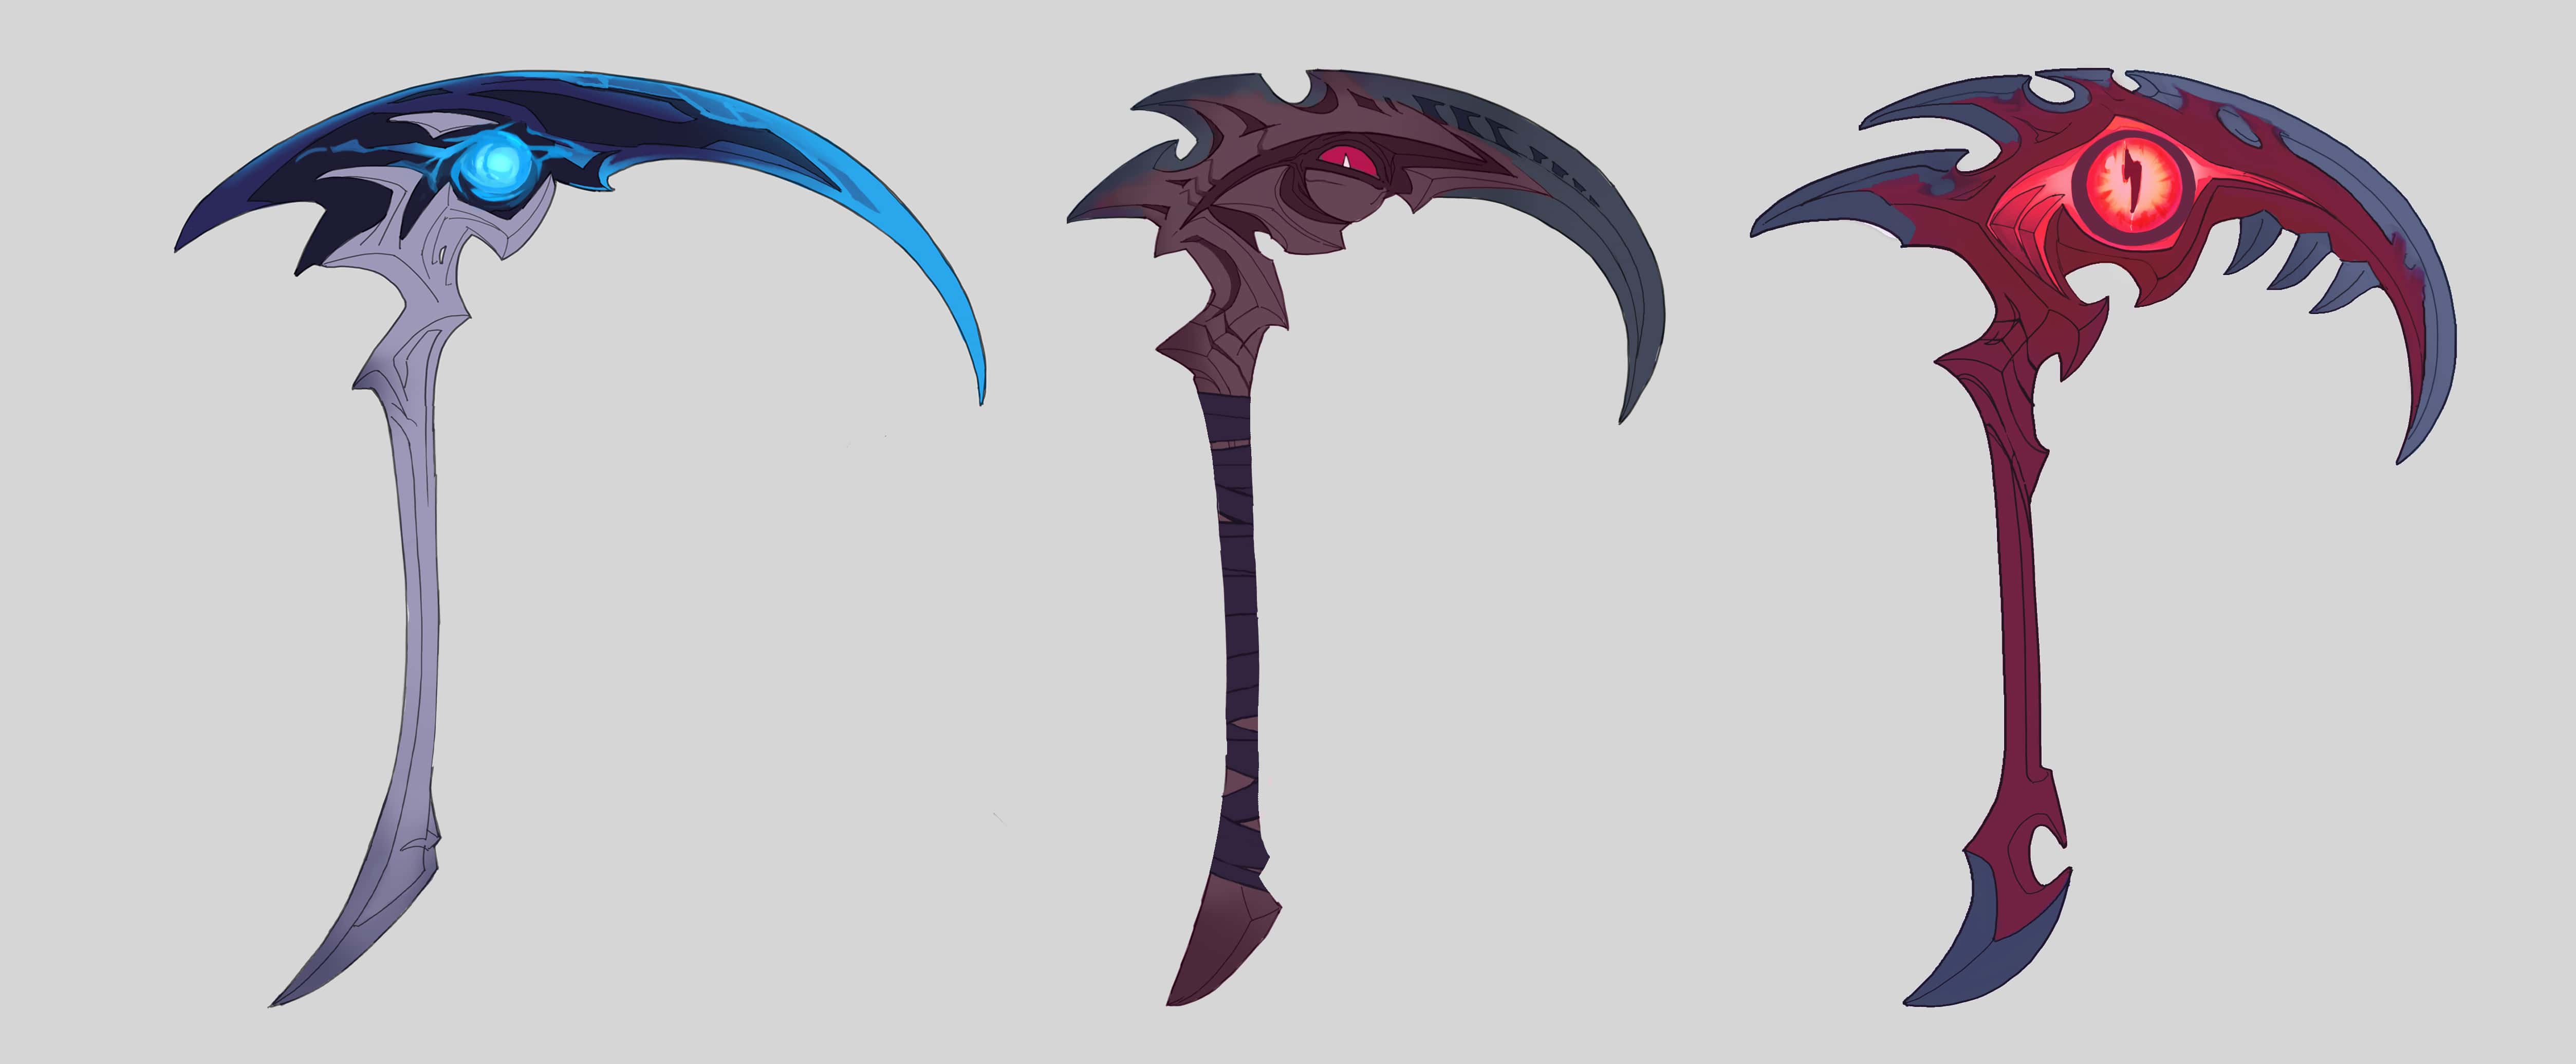
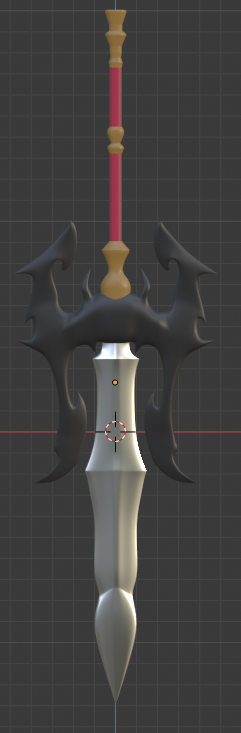
During the marking period I worked on parts of the story which can be seen below. I was able to work on the main antagonist(The red character), a monster and the protagonist's weapon. While I don't have the picture I also created the first version of the 3D printed box. It turned out a lot smaller than expected so I learned I had to print the top and actual box itself seperately. I also worked on a version of the set for valentine. Even though after some work on it I realized I did not need to make it so I just worked on it for practice.


Evaluating
How I felt over this marking period is better than the last one. I was able to accomplish a lot more than the first I feel happy about that. But like last marking period I feel like I could still improve on time management with working on these things. For me it's just a bad habit I really wish to improve on by designating time for the story and the other parts. Overall I felt like I improved compared to last marking period with modeling but I still want to improve more.

Integrating
Since I have moved on to blender 2.8 there are a lot of new features for me to take advantage of such as it's new rendering engine which makes rendering a lot better and more managable compared to its previous versions. However there are still many features I still haven't messed with that I feel if I took advantage of I could really improve my modeling with it.

Wednesday, January 1, 2020

Make up Investigation(3)

Another thing I did over Christmas break was do some investigation for the main character design. I wanted to the make the main character stand out so I wanted to see what I could find/come up with. What I came across was a cloak style that I really enjoyed and hope to see if I can replicated. I really like the look of the first one and want to see if I can make something similar to that. I can understand how its made where its just parts extruded of the main character. It something similar to the previous years of digital modeling where we made a character model so I can use it as a reference in making the character. The only difference I would do is see if I could smooth it out instead of it having that low poly look to it. Overall when I get back into school I hope to work on something similar and reference back to these images when working on the character.


Image result for blender low poly hero

             
Related image

Make up Investigation(2)

I did some research on 3d printing with locks and I found a website that goes over a man who was able to 3D print a key for a lock and actually get it to work. The way he did this was taking flat pictures of his key and then carefully tracing it in blender. After tracing it he extruded it slightly and then 3d printed it. To his surprise he got it to work the first try he printed it. I really thought this was a neat idea and want to see if I can try and replicate this experiment. If I can I want to see if there are other things I can try use this idea with. Possibly maybe try some kind of gear setup or do something with screws and see if if I can make a tightened object with said screws or something of the sort. 

Make up Investigation(1)

Image result for deckbox
https://pbs.twimg.com/media/DeoowN-UwAAQaWQ.jpg 


At the last week of school before Christmas break I attempted to 3D print my finished modeled deckbox. When it was printed I made the mistake of printing the lid with the box itself. Making the whole thing smaller in the process. So I figured out I have to print each part of the deckbox seperetly. When I plan to do next is somthing similar to the picture to the left. Where the box top connects to the bottom sealing it while also being a great way for a lid to work. I want to go more into using physical locks and such with 3D printing. I want to see the extent of what I can accomplish with only 3D printing.


Late Blogpost 2

Semi-recently I had attempted to enter a contest to be an accessory creator. The task was to create two accessories that took up two differe...